
PCB Assembly Wiki: A Comprehensive Guide to Printed Circuit Board Assembly
If you are looking for information on PCB assembly, then you have come to the right place. PCB assembly, or printed circuit board assembly, is the process of connecting electronic components to a PCB. This process is crucial for the functioning of electronic devices, from smartphones to medical equipment.

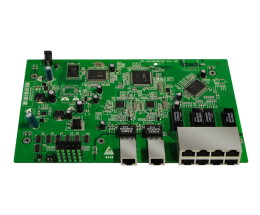
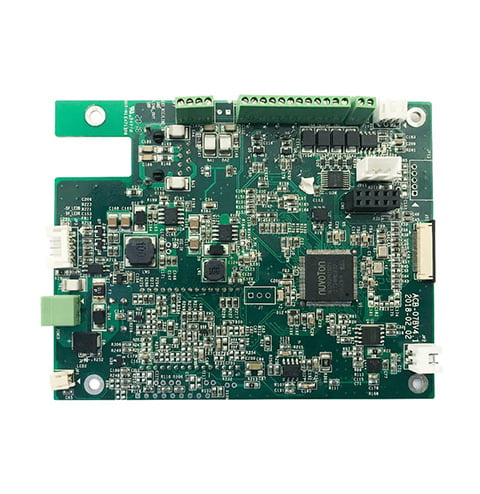
A PCB is a board that has conductive pathways etched onto its surface. These pathways are used to connect the electronic components to each other and to the power source. The assembly process involves placing the components onto the board and soldering them in place. Once the components are connected, the PCB can be tested to ensure that it is functioning properly.
PCB Assembly Basics

If you’re new to printed circuit board (PCB) assembly, it’s important to understand the basics of how it works. In this section, we’ll cover the main components of PCB assembly and the assembly process itself.
Components of PCB Assembly
PCB assembly involves several components that work together to create a functional circuit board. These components include:
- PCB: The PCB is the physical board that serves as the foundation for the circuit. It is made of a non-conductive material (such as fiberglass) and has conductive pathways etched onto it.
- Components: Components are the individual parts that make up the circuit. These can include resistors, capacitors, diodes, and more.
- Solder: Solder is used to attach the components to the PCB. It is a metal alloy that melts at a low temperature and solidifies quickly.
- Flux: Flux is a chemical that is used to clean the surfaces of the PCB and components before soldering. It helps to remove any oxidation or other contaminants that could interfere with the soldering process.
PCB Assembly Process
The PCB assembly process involves several steps, including:
- Design: The first step is to design the circuit itself. This involves selecting the components, determining their placement on the PCB, and creating the circuit diagram.
- Manufacturing: Once the design is complete, the PCB is manufactured. This involves etching the conductive pathways onto the board and drilling any necessary holes.
- Component Placement: The components are then placed onto the PCB. This can be done manually or with the help of automated equipment.
- Soldering: The components are then soldered onto the PCB using a soldering iron or other equipment.
- Testing: Finally, the circuit is tested to ensure that it is functioning correctly. Any necessary adjustments or repairs are made at this stage.
Overall, PCB assembly is a complex process that requires careful attention to detail. By understanding the components and the assembly process, you can ensure that your circuit is of the highest quality and will function as intended.
Soldering Techniques

When it comes to PCB assembly, soldering is one of the most critical steps. Soldering is the process of joining two or more metal components using a filler metal alloy known as solder. There are two main types of soldering techniques: wave soldering and reflow soldering.
Wave Soldering
Wave soldering is a soldering technique that is commonly used in mass production. In wave soldering, the PCB is passed over a wave of molten solder, which creates a permanent bond between the components and the board. This technique is suitable for through-hole components, which have leads that pass through the board.
Wave soldering is a highly efficient process, as it can solder multiple components at once. However, it is not suitable for surface mount components, which have leads that are soldered to the surface of the board.
Reflow Soldering
Reflow soldering is a soldering technique that is commonly used for surface mount components. In reflow soldering, the solder paste is applied to the surface of the board, and the components are placed on top of the solder paste. The board is then heated in a reflow oven, which melts the solder paste and creates a permanent bond between the components and the board.
Reflow soldering is a highly precise process, as it allows for the accurate placement of surface mount components. It is also a more flexible process, as it can be used for both through-hole and surface mount components.
In summary, both wave soldering and reflow soldering are essential techniques in PCB assembly. While wave soldering is suitable for through-hole components and is highly efficient, reflow soldering is suitable for surface mount components and is highly precise.
Testing and Quality Assurance
When it comes to PCB assembly, testing and quality assurance are crucial steps to ensure that the final product is functional and reliable. In this section, we will discuss the inspection methods and functional testing that are commonly used to ensure the quality of PCBs.
Inspection Methods
There are several inspection methods used during PCB assembly to ensure that the bare PCBs are of high quality and that the final product is free of defects. Visual inspection is one of the most common methods used to identify solder defects and other visible defects such as component orientation. Automated Optical Inspection (AOI) is another popular inspection method that uses cameras and specialized software to detect defects such as missing components, incorrect polarity, and solder bridges.
X-ray inspection is a non-destructive method used to inspect the internal structure of the PCB assembly. This method is particularly useful for identifying defects such as voids in solder joints, insufficient solder, and misaligned components. Additionally, In-Circuit Testing (ICT) is a robust and comprehensive testing method that involves powering up and actuating individual circuitry on the PCB to check for defects. ICT provides high coverage and can identify issues with solder connections, component failures, or faulty circuitry.
Functional Testing
Functional testing is an important step in PCB assembly that ensures that the final product is functional and reliable. This testing is done to verify that the PCB assembly meets the required specifications and performs as expected. Functional testing can be performed manually or using automated test equipment.
One of the most common functional testing methods is the Flying Probe Test. This method uses a series of probes to test the connectivity of the PCB assembly. Another popular method is the In-Circuit Functional Test. This method involves testing the functionality of the PCB assembly while it is powered on and connected to the system it will be used in. This type of testing can detect issues such as incorrect component values, incorrect component orientation, and incorrect wiring.
Testing and quality assurance are crucial steps in PCB assembly that ensure the final product is functional and reliable. Inspection methods such as visual inspection, AOI, X-ray inspection, and ICT are used to identify defects, while functional testing methods such as the Flying Probe Test and In-Circuit Functional Test are used to verify that the PCB assembly meets the required specifications and performs as expected.
Advanced PCB Assembly Technologies
When it comes to PCB assembly, there are two main technologies: surface mount technology (SMT) and through-hole technology (THT). Both have their own advantages and disadvantages, and which one you choose depends on your specific requirements.
Surface Mount Technology
Surface mount technology is a method for attaching electronic components to the surface of a printed circuit board (PCB). This technology has become increasingly popular in recent years due to its ability to create smaller and lighter boards. SMT components are typically smaller than their through-hole counterparts, which allows for greater component density on the board. This means that you can fit more components onto a smaller board, which can be particularly useful in applications where space is limited.
SMT components are attached to the board using a reflow soldering process. This involves applying solder paste to the board, placing the components onto the paste, and then heating the board to melt the solder and permanently attach the components. This process is highly automated, which means that it can be done quickly and efficiently.
Through-Hole Technology
Through-hole technology is a method for attaching electronic components to a PCB by inserting the component leads through holes in the board and then soldering them in place on the other side. This technology has been around for many years and is still widely used today, particularly for larger components and for applications where high reliability is required.
Through-hole components are typically larger than their SMT counterparts, which means that they can handle higher power and have a greater resistance to vibration and shock. This makes them particularly useful in applications where the board will be exposed to harsh environments.
In conclusion, both SMT and THT have their own advantages and disadvantages, and which one you choose depends on your specific requirements. SMT is great for creating smaller and lighter boards, while THT is better for applications where high reliability is required.

