
Prototype Electronic PCB Assembly: A Comprehensive Guide
If you’re looking to create a new electronic device, or improve upon an existing one, then you’ll need to prototype it. Prototyping is the process of creating a preliminary version of your device, which you can use to test its functionality, signal integrity, and manufacturability. One of the most important components of any electronic device is the printed circuit board (PCB), which provides the physical platform to mount and interconnect electronic components using conductive tracks, pads, and other features. In this article, we’ll take a closer look at prototype electronic PCB assembly, and how it can help you bring your electronic device to life.

The process of prototype electronic PCB assembly involves a sequence of stages, including the initial design conceptualization, layout optimization, manufacturing, assembly, thorough testing, and iterative enhancements. Each stage is critical to the success of your project, and requires careful planning and execution. With the right approach, however, you can create a prototype that accurately reflects your vision for your electronic device, and that can be used to test and refine your design until it’s ready for mass production. Whether you’re a seasoned electronics engineer or a novice hobbyist, prototype electronic PCB assembly is an essential tool in your arsenal, and one that can help you turn your ideas into reality.
Overview of PCB Assembly

When it comes to electronic PCB assembly, there are two main types: through-hole and surface mount. Through-hole components require holes to be drilled in the PCB, while surface mount components are placed directly on the surface of the board.
Components of PCB Assembly
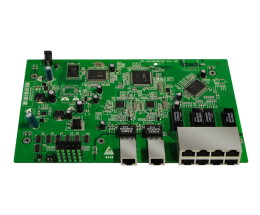
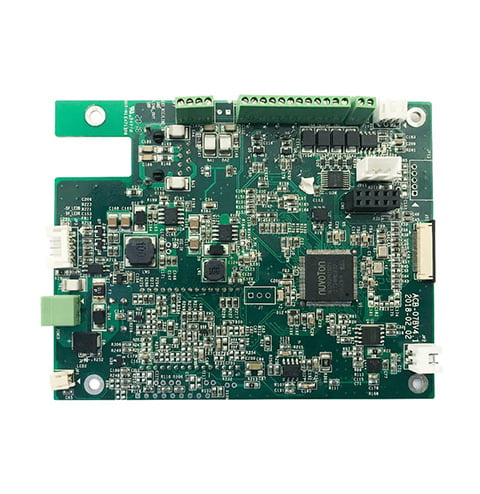
Regardless of the type of assembly, the components used in PCB assembly are largely the same. These include resistors, capacitors, diodes, transistors, and integrated circuits. Each of these components serves a specific purpose in the circuit and must be placed correctly to ensure proper functionality.
Types of PCB Assembly
As previously mentioned, there are two main types of PCB assembly: through-hole and surface mount. Through-hole assembly is typically used for larger components or those that require more secure connections. Surface mount assembly, on the other hand, is used for smaller components and allows for a higher density of components on the board.
In addition to these two types, there are also mixed assembly boards that use both through-hole and surface mount components. These boards offer the best of both worlds, allowing for secure connections for larger components while still allowing for a high density of smaller components.
Overall, PCB assembly is a complex process that requires careful attention to detail. Whether you are assembling a simple circuit or a complex system, it is important to choose the right components and assembly method to ensure proper functionality.
Prototype PCB Assembly Process

When it comes to electronic PCB assembly, prototyping is an essential step in the process. This section will take you through the basic steps involved in prototyping a PCB assembly, from design and layout to quality control.
Design and Layout
The first step in prototyping a PCB assembly is to design and layout the board. This involves creating a schematic of the circuit and then laying out the components on the board. There are several software tools available to help with this process, such as Altium Designer, Eagle PCB, and KiCad. Once the design is complete, it is important to review and verify the schematic and layout for accuracy.
Prototype Manufacturing
After the design and layout stage, the next step is to manufacture the prototype PCB. This involves creating a physical board from the design files. There are several methods for manufacturing a prototype PCB, including etching, milling, and printing. Each method has its advantages and disadvantages, and the choice depends on the complexity of the design, the number of boards required, and the available resources.
Assembly and Soldering
Once the prototype PCB has been manufactured, the next step is to assemble and solder the components onto the board. This involves placing the components onto the board according to the layout, and then soldering them in place. There are two main methods for soldering components onto a PCB: surface mount technology (SMT) and through-hole technology (THT). SMT is the most common method used today, as it allows for smaller components and higher component density.
Quality Control
The final step in the prototyping process is quality control. This involves testing the prototype PCB to ensure that it functions correctly and meets the design specifications. There are several methods for testing a PCB, including visual inspection, functional testing, and electrical testing. It is important to perform thorough testing to identify any issues and make any necessary changes before moving on to mass production.
Prototyping is a crucial step in the electronic PCB assembly process. By following the steps outlined in this section, you can create a functional prototype PCB that meets your design specifications.
Challenges in Prototype PCB Assembly

Prototype electronic PCB assembly is a crucial step in the product development process for electronic devices. However, it comes with its own set of challenges that need to be addressed to ensure a successful outcome. In this section, we will discuss some of the common challenges you may encounter during prototype PCB assembly.
Component Sourcing
One of the biggest challenges in prototype PCB assembly is sourcing the right components. It is important to ensure that the components you use are of high quality and meet the specifications of your design. However, sourcing components can be a time-consuming process, and it can be challenging to find the right components at a reasonable cost.
To overcome this challenge, you can work with a trusted supplier who can provide you with high-quality components at a reasonable cost. You can also consider using off-the-shelf components that are readily available in the market. This can help you save time and money while ensuring that your prototype is built using reliable components.
Design Iterations
Another challenge in prototype PCB assembly is design iterations. It is common for the design to undergo several iterations before it is finalized. Each iteration requires changes to the PCB layout, which can be time-consuming and costly.
To overcome this challenge, you can use software tools that allow you to simulate the PCB layout and test the design before it is built. This can help you identify issues early on and make changes to the design without having to rebuild the PCB.
Testing and Validation
Testing and validation are critical steps in prototype PCB assembly. It is important to ensure that the prototype functions as expected and meets the design specifications. However, testing and validation can be time-consuming and require specialized equipment.
To overcome this challenge, you can work with a testing and validation service provider who can help you test and validate your prototype. This can help you save time and money while ensuring that your prototype meets the required specifications. You can also consider using automated testing tools that can help you test your prototype quickly and efficiently.
Prototype electronic PCB assembly comes with its own set of challenges. However, by working with a trusted supplier, using software tools for design iterations, and leveraging testing and validation services, you can overcome these challenges and ensure a successful outcome for your prototype.
Advancements in Prototype Assembly Technology

Automated Assembly Machines
Automated assembly machines have revolutionized the way electronic PCB assembly is done. These machines are capable of assembling PCBs with a high degree of accuracy and speed. They are equipped with advanced software that can detect errors and make corrections in real time. With automated assembly machines, you can minimize the risk of human error and improve the quality of your PCBs.
One of the key advantages of automated assembly machines is their ability to handle complex PCB designs. They can handle multiple layers, small components, and fine pitch components with ease. Additionally, they can handle a wide range of PCB materials, including FR-4, Rogers, and polyimide.
3D Printing in PCB Prototyping
3D printing has become an increasingly popular technology in the field of PCB prototyping. With 3D printing, you can create complex PCB designs quickly and easily. This technology allows you to create prototypes with a high degree of accuracy and precision, which can help you save time and money.
One of the key benefits of 3D printing in PCB prototyping is its ability to create custom shapes and sizes. With 3D printing, you can create PCBs that are tailored to your specific needs. Additionally, 3D printing can help you reduce waste and save on materials.
Another advantage of 3D printing in PCB prototyping is its ability to create functional prototypes. With 3D printing, you can create prototypes that are fully functional and can be tested in real-world conditions. This can help you identify and correct errors early in the design process, which can save you time and money in the long run.
Advancements in prototype assembly technology have made electronic PCB assembly faster, more accurate, and more efficient. With automated assembly machines and 3D printing, you can create high-quality PCBs that meet your specific needs.
Best Practices for Efficient PCB Prototyping

When it comes to PCB prototyping, efficiency is key. Here are some best practices to keep in mind to ensure that your PCB prototyping process is as efficient as possible.
Design for Manufacturing
One of the most important factors to consider when designing a PCB for prototyping is manufacturability. This means designing the PCB in a way that makes it easy and cost-effective to manufacture. To achieve this, you should consider the following:
- Minimizing the number of components and layers: The more components and layers a PCB has, the more complex and expensive it is to manufacture.
- Standardizing components: Using standardized components can help reduce costs and improve efficiency by making it easier to source and assemble components.
- Using design rules: Design rules help ensure that the PCB can be manufactured correctly and efficiently. Make sure to follow the design rules provided by your manufacturer.
Component Standardization
Standardizing components is another key factor in efficient PCB prototyping. This means using components that are widely available and easy to source. By standardizing components, you can:
- Reduce lead times: By using components that are easy to source, you can reduce the time it takes to get your PCBs manufactured.
- Improve quality: Standardized components are often more reliable and have been thoroughly tested, which can help improve the quality of your PCBs.
- Reduce costs: Standardized components are often less expensive than custom components, which can help reduce the overall cost of your PCBs.
Collaboration with Manufacturers
Collaborating with your PCB manufacturer can help improve the efficiency of your PCB prototyping process. By working closely with your manufacturer, you can:
- Get feedback on your designs: Your manufacturer can provide valuable feedback on your designs, which can help you optimize your PCBs for manufacturability.
- Reduce lead times: By working closely with your manufacturer, you can reduce the time it takes to get your PCBs manufactured.
- Improve quality: By collaborating with your manufacturer, you can ensure that your PCBs are manufactured to the highest quality standards.

