
PCB Printing and Assembly: A Comprehensive Guide
If you’re an electronics hobbyist or a professional in the industry, you’re probably familiar with printed circuit boards (PCBs). PCBs are the backbone of most electronic devices and are essential for their proper functioning. They are used to connect electronic components and provide a platform for them to communicate with each other.

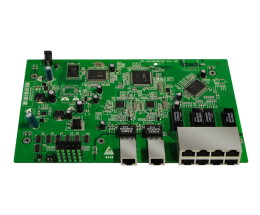
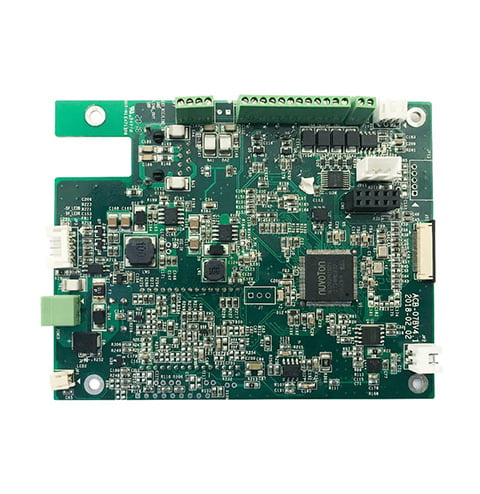
PCBs are made up of several layers of copper and other materials that are etched to create the necessary pathways for the electrical signals to travel. The process of creating a PCB involves several steps, including designing the circuit, printing the circuit on a substrate, and assembling the components onto the PCB. PCB printing and assembly is a complex process that requires precision and accuracy to ensure the final product functions as intended.
When it comes to PCB printing and assembly, there are several methods available, each with its own advantages and disadvantages. Some of the most common methods include surface mount technology (SMT), through-hole technology (THT), and mixed technology. The choice of method depends on several factors, including the complexity of the circuit, the size of the PCB, and the required precision and accuracy. Regardless of the method used, the end goal is to create a reliable and functional PCB that meets the required specifications.
Overview of PCB Printing

When it comes to PCB printing, there are two main aspects to consider: PCB design and layout, and printing technologies. In this section, we will provide an overview of these two aspects.
PCB Design and Layout
The first step in PCB printing is designing the circuit board. This involves creating a schematic of the circuit and then laying out the components and traces on the board. The design process can be done using various software tools, such as Altium Designer, Eagle PCB, or KiCad. These tools provide a user-friendly interface for designing the board, and they also provide features such as auto-routing, design rule checking, and 3D visualization.
Once the design is complete, the layout is exported to a file format that can be used by the PCB printing machine. The most common file formats used are Gerber and ODB++, which contain all the necessary information about the board layout, including the location of the components, traces, and vias.
Printing Technologies
There are several printing technologies used in PCB printing, including screen printing, inkjet printing, and laser printing. Each of these technologies has its advantages and disadvantages, and the choice of technology depends on the requirements of the PCB design.
Screen printing is the most common technology used in PCB printing. It involves using a stencil to apply a layer of ink onto the board, which is then cured using heat. Screen printing is a reliable and cost-effective method, but it has limitations in terms of resolution and accuracy.
Inkjet printing is a newer technology that allows for higher resolution and accuracy compared to screen printing. It involves using a print head to deposit tiny droplets of ink onto the board. Inkjet printing is more expensive than screen printing, but it is suitable for printing complex designs and prototypes.
Laser printing is a high-precision technology that uses a laser to selectively remove a layer of material from the board. This technology is suitable for printing high-density boards and for creating very fine traces and features. However, it is also the most expensive technology and is not commonly used for low-volume production.
Overall, PCB printing is a complex process that requires careful planning and execution. By understanding the basics of PCB design and layout and the different printing technologies available, you can make informed decisions about your PCB printing needs.
PCB Assembly Process

When it comes to the PCB assembly process, there are several steps that need to be followed to ensure that the final product is of high quality. In this section, we will discuss the various steps involved in the PCB assembly process.
Solder Paste Application
The first step in the PCB assembly process is the application of solder paste. This is typically done using a stencil that is placed over the PCB. The solder paste is then applied to the stencil and forced through the openings onto the PCB. This process ensures that the solder paste is applied evenly and accurately.
Pick and Place
Once the solder paste has been applied, the next step is pick and place. This involves the placement of surface mount components onto the PCB. This is typically done using a pick and place machine, which uses a vacuum to pick up the components and place them onto the PCB. This process is highly accurate and ensures that the components are placed in the correct location.
Reflow Soldering
After the components have been placed onto the PCB, the next step is reflow soldering. This involves heating the PCB to a specific temperature to melt the solder paste and fuse the components to the PCB. This is typically done using a reflow oven, which ensures that the temperature is controlled and consistent throughout the process.
Inspection and Quality Control
The final step in the PCB assembly process is inspection and quality control. This involves a thorough inspection of the PCB to ensure that all components are properly placed and that there are no defects or issues with the PCB. This is typically done using automated inspection equipment, which can detect any issues that may be present.
The PCB assembly process is a critical step in the production of high-quality PCBs. By following the steps outlined above, you can ensure that your PCBs are of the highest quality and meet all necessary standards.
Materials and Components
When it comes to PCB printing and assembly, selecting the right materials and components is crucial. In this section, we will discuss the two main components of PCBs: substrate materials and electronic components.
Substrate Materials
Substrate materials are the base upon which the copper and other components are attached. There are several types of substrate materials available, including FR-4, CEM-1, CEM-3, and Rogers. FR-4 is the most commonly used substrate material due to its low cost, high durability, and excellent electrical insulation properties. CEM-1 and CEM-3 are similar to FR-4 but have lower insulation properties and are less durable. Rogers is a high-performance substrate material that is used in specialized applications that require high-frequency signals.
Electronic Components
Electronic components are the building blocks of PCBs. They include resistors, capacitors, diodes, transistors, and integrated circuits. Each component has a specific function and is selected based on the requirements of the circuit. For example, resistors are used to limit the flow of current, while capacitors are used to store and release electrical energy. Diodes are used to allow current to flow in one direction only, while transistors are used to amplify or switch electronic signals.
When selecting electronic components, it is important to consider factors such as size, cost, and availability. Surface-mount components are smaller and more cost-effective than through-hole components, but they may be more difficult to solder. Through-hole components are larger and more expensive, but they are easier to work with and may be more reliable.
In summary, selecting the right substrate materials and electronic components is essential for successful PCB printing and assembly. By carefully considering the requirements of your circuit and the properties of each material and component, you can ensure that your PCB is reliable, durable, and cost-effective.
Testing and Prototyping
When it comes to PCB printing and assembly, testing and prototyping are crucial steps in the process. These steps help ensure that the final product is functional and meets the necessary standards.
Functional Testing
Functional testing involves testing the PCB to ensure that it performs as intended. This type of testing is typically done after the PCB has been assembled. It involves testing each component of the PCB to ensure that it is working correctly. This can be done manually or using automated testing equipment.
One common method of functional testing is the use of a test fixture. This is a device that is designed to hold the PCB in place and apply the necessary signals to test each component. Test fixtures can be designed for specific PCBs or can be generic fixtures that can be used for multiple PCBs.
Rapid Prototyping
Rapid prototyping is a process that allows for the quick creation of a prototype PCB. This process is often used during the design phase to test different design options and to identify any potential issues before moving on to full-scale production.
One common method of rapid prototyping is the use of a 3D printer. 3D printing allows for the creation of a physical model of the PCB, which can then be tested to ensure that it performs as intended. This process can be done quickly and at a relatively low cost, making it an ideal option for rapid prototyping.
Another method of rapid prototyping is the use of a breadboard. Breadboards allow for the quick and easy testing of different circuit designs. They are often used during the design phase to test different components and to identify any potential issues before moving on to full-scale production.
Testing and prototyping are crucial steps in the PCB printing and assembly process. Functional testing ensures that the final product is functional and meets the necessary standards, while rapid prototyping allows for the quick creation of a prototype PCB to test different design options and identify potential issues.
Advanced PCB Technologies
When it comes to PCB printing and assembly, there are several advanced technologies that can help you achieve your goals. Here are two of the most promising ones:
Flexible PCBs
Flexible PCBs, also known as flex circuits, are a type of PCB that can bend and twist without breaking. They are made of a thin, flexible material such as polyimide or polyester, and are often used in applications where space is limited or where the PCB needs to conform to a particular shape.
One advantage of flexible PCBs is that they can be used to reduce the size and weight of electronic devices. They are also more durable than rigid PCBs, as they are less likely to crack or break when subjected to stress or vibration.
Another advantage of flexible PCBs is that they can be used to create complex, three-dimensional shapes that are not possible with rigid PCBs. This can be useful in applications such as medical devices, where the PCB needs to fit into a specific space or conform to the shape of a particular organ.
Embedded Components
Embedded components are another advanced technology that can be used in PCB printing and assembly. With embedded components, the components are placed inside the PCB itself, rather than on the surface. This can help to reduce the size and weight of the PCB, as well as improve its performance.
One advantage of embedded components is that they can help to reduce the number of components required in a particular design. This can help to simplify the design process and reduce the cost of the PCB.
Another advantage of embedded components is that they can help to improve the performance of the PCB. By placing components closer together and reducing the length of the interconnects, embedded components can help to reduce the resistance and capacitance of the PCB, which can improve its speed and reliability.
In summary, flexible PCBs and embedded components are two advanced technologies that can help you achieve your goals in PCB printing and assembly. By using these technologies, you can create smaller, lighter, and more durable PCBs that perform better than traditional rigid PCBs.
Frequently Asked Questions
What factors influence the cost of PCB assembly?
Several factors can influence the cost of PCB assembly, including the complexity of the design, the number of components, the type of components, the size of the board, and the quantity of boards ordered. As the complexity of the design and the number of components increase, so does the cost of assembly. Additionally, if specialized components are required, this can also increase the cost. The size of the board and the quantity of boards ordered can also affect the cost of assembly.
How does the PCB assembly process work?
The PCB assembly process involves several steps, including solder paste application, component placement, soldering, inspection, and testing. First, solder paste is applied to the board using a stencil. Then, the components are placed on the board using pick-and-place machines. The board is then heated to melt the solder paste and create a connection between the components and the board. After soldering, the board is inspected for defects, and if necessary, reworked. Finally, the board is tested to ensure it meets the required specifications.
What are the benefits of using turnkey PCB assembly services?
Using turnkey PCB assembly services can offer many benefits, including reduced lead times, lower costs, and improved quality. Turnkey services provide a one-stop-shop for PCB assembly, which means that the provider takes care of everything from sourcing components to testing the finished product. This can help reduce lead times and lower costs since the provider can leverage their relationships with suppliers to get better pricing and faster delivery times. Additionally, turnkey services can help improve quality since the provider is responsible for all aspects of the assembly process.
How do I choose a reliable PCB assembly provider?
When choosing a PCB assembly provider, there are several factors to consider, including experience, certifications, quality control processes, and customer service. Look for a provider with a proven track record of delivering high-quality products on time and within budget. Additionally, make sure the provider has relevant certifications, such as ISO 9001 or IPC-A-610, which demonstrate their commitment to quality. Finally, choose a provider that offers excellent customer service and is responsive to your needs.
What should I expect during the prototype PCB assembly phase?
During the prototype PCB assembly phase, you should expect to work closely with your assembly provider to ensure that your design is manufacturable and meets your requirements. Your provider should be able to offer feedback on your design and suggest any changes that may be necessary to optimize the manufacturing process. Additionally, you should expect to receive regular updates on the progress of your assembly and have the opportunity to provide feedback and make changes as necessary.
How is an assembly drawing used in the PCB manufacturing process?
An assembly drawing is used in the PCB manufacturing process to provide detailed instructions on how to assemble the board. The drawing includes information on the placement of components, the orientation of components, and any special instructions for soldering or reworking. The drawing is typically created using CAD software and is used by the assembly provider to ensure that the board is assembled correctly and meets the required specifications.

