
PCB Manufacture and Assembly: A Comprehensive Guide
If you are looking to create a printed circuit board (PCB), there are two main processes you need to be familiar with: PCB fabrication and assembly. PCB fabrication involves creating the board itself, while assembly involves adding the necessary components to the board.

PCB fabrication is the process of designing and producing the bare board that will serve as the foundation for your electronic device. This process involves designing the layout of the board, selecting the right materials, and using specialized equipment to etch the copper traces and drill the necessary holes. The end result is a board that is ready to have components added to it during the assembly process.
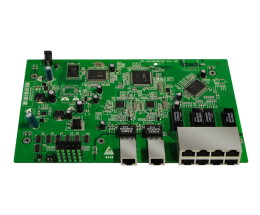
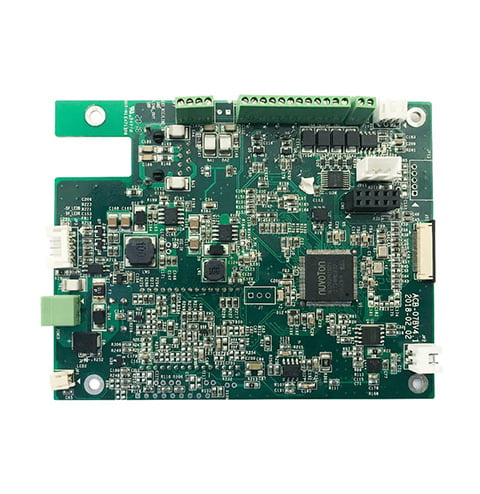
PCB assembly, on the other hand, involves adding components to the bare board to create a functional electronic device. This process can be done manually or with the help of specialized equipment. During assembly, components like resistors, capacitors, and integrated circuits are attached to the board using solder. Once all of the components are in place, the board is tested to ensure that it functions as expected.
PCB Design Principles

When designing a printed circuit board (PCB), there are several important principles to keep in mind to ensure the final product is reliable and manufacturable. Here are some key considerations for successful PCB design.
Schematic Capture
The first step in PCB design is schematic capture. This involves creating a graphical representation of the circuit using symbols that represent components and lines that connect them. It is important to ensure that the schematic is accurate and complete, as any errors or omissions at this stage can lead to problems later in the design process.
To ensure accuracy, it is recommended to use a schematic capture tool that includes a library of pre-made component symbols and allows you to easily create custom symbols. Additionally, it is important to label all components and connections clearly and consistently, and to follow standard conventions for signal names and power and ground connections.
Layout and Routing
Once the schematic is complete, the next step is to lay out the physical components on the PCB and route the connections between them. This involves placing components in a logical and efficient manner, and routing traces to minimize noise and interference.
When laying out the PCB, it is important to consider factors such as component placement, signal integrity, power and ground planes, and thermal management. Additionally, it is important to follow design rules for trace width, spacing, and clearance to ensure that the board can be manufactured reliably.
Design for Manufacturability
Design for manufacturability (DFM) is the process of designing a product in a way that makes it easy and cost-effective to manufacture. In the context of PCB design, this involves considering factors such as component availability, assembly processes, and testability.
To ensure DFM, it is important to use standard components and footprints wherever possible, and to avoid using components that are difficult to source or assemble. Additionally, it is important to design the PCB in a way that allows for easy assembly and testing, such as by minimizing the number of unique components and simplifying the routing of traces.
By following these PCB design principles, you can ensure that your final product is reliable, manufacturable, and cost-effective.
Materials and Components

When it comes to PCB manufacturing and assembly, the materials and components used play a crucial role in the final product’s quality and performance. In this section, we will discuss the different materials and components used in PCB production.
Substrate Materials
The substrate material is the foundation of the PCB. It provides mechanical support and electrical insulation between the different layers of the PCB. The most commonly used substrate material is FR-4, a glass-reinforced epoxy laminate. Other substrate materials include polyimide, ceramic, and metal core.
Electronic Components
Electronic components are the building blocks of a PCB. They are the parts that perform specific functions, such as resistors, capacitors, diodes, and transistors. Electronic components come in different sizes, shapes, and materials. They can be through-hole or surface mount, and they can be passive or active.
Surface Finish Types
The surface finish is the final coating applied to the PCB after the components have been attached. It protects the copper traces from oxidation and provides a flat and even surface for soldering. The most commonly used surface finish types are HASL (Hot Air Solder Leveling), ENIG (Electroless Nickel Immersion Gold), and OSP (Organic Solderability Preservatives).
In summary, the materials and components used in PCB manufacturing and assembly are critical to the final product’s quality and performance. The substrate material provides mechanical support and electrical insulation, electronic components perform specific functions, and the surface finish protects the copper traces and provides a flat surface for soldering. By understanding these different materials and components, you can make informed decisions when designing and manufacturing your PCB.
Manufacturing Process
PCB manufacturing process involves several steps that work together to make sure that the PCB functions well. Here are the three main subsections of the manufacturing process:
Imaging and Etching
The first step in the manufacturing process is the imaging and etching of the copper layer. A thin layer of photosensitive material (photoresist) is applied to the copper layer, and the PCB design is printed onto the photoresist layer. The photoresist is then exposed to UV light through a mask, which allows the areas of the photoresist not covered by the mask to harden.
The PCB is then placed in an etching solution, which removes the exposed copper, leaving only the copper traces and pads. The remaining photoresist is then removed, leaving the copper traces and pads ready for the next step.
Layer Stackup
The layer stackup process involves the lamination of multiple layers of PCBs to create a single board. The layers are first drilled with small holes for the vias, which allow electrical connections between the layers. The layers are then aligned and laminated together with a heat-activated adhesive.
The final board thickness is determined by the number and thickness of the layers used. The layer stackup process is critical to the performance of the PCB, as it determines the electrical characteristics of the board.
Drilling and Plating
The final step in the manufacturing process is drilling and plating. The PCB is drilled with small holes for the components and vias. The holes are then plated with a thin layer of copper to create a conductive path between the layers.
The plating process also involves the application of a thin layer of solder mask and silkscreen to the surface of the board. The solder mask protects the copper traces from oxidation and solder bridging during assembly, while the silkscreen provides component placement and identification information.
Overall, the PCB manufacturing process is a complex and multi-step process that requires precision and expertise. By following the proper manufacturing process, you can ensure that your PCB functions well and meets your design requirements.
Assembly Techniques
When it comes to PCB assembly, there are various techniques that can be used to ensure the components are properly placed and soldered onto the board. In this section, we will discuss three common assembly techniques: Soldering Methods, Pick and Place, and Reflow Soldering.
Soldering Methods
Soldering is the process of joining two metals together using a filler metal. There are two main soldering methods used in PCB assembly: through-hole soldering and surface-mount soldering. Through-hole soldering involves inserting the component leads through holes in the PCB and soldering them to the other side of the board. Surface-mount soldering, on the other hand, involves placing the components directly onto the surface of the PCB and soldering them in place.
Pick and Place
Pick and Place is an automated process that involves using a machine to accurately place components onto the PCB. The machine uses a vacuum to pick up the components and place them onto the PCB with precision. This process is much faster and more accurate than manual placement, which can be time-consuming and prone to errors.
Reflow Soldering
Reflow soldering is a process that involves heating the PCB and components to a specific temperature to melt the solder and create a permanent bond between the components and the board. This process is typically done in a reflow oven, which heats the board and components to the desired temperature and then cools them down slowly to prevent damage to the components.
In conclusion, these assembly techniques are essential to ensure that the components are properly placed and soldered onto the PCB. By using these techniques, you can ensure that your PCBs are reliable and functional.
Quality Control and Testing
When it comes to manufacturing and assembly of PCBs, quality control and testing are crucial to ensure the final product meets performance expectations and complies with industry standards.
Inspection Methods
Visual inspection is one of the most common inspection methods for PCBs. It involves using a magnifier or the technician’s bare eyes to manually find solder defects and other visible defects such as component orientation. Automated Optical Inspection (AOI) is another inspection method that uses cameras to scan the board and detect defects. X-ray inspection is used to detect defects that are not visible to the naked eye, such as solder voids and misalignments.
Functional Testing
Functional testing is performed to ensure that the PCB functions as intended. This type of testing involves applying power to the board and testing its functions, such as input/output, signal integrity, and power consumption. In-Circuit Testing (ICT) is a common functional testing method that tests the individual components on the board. Flying Probe Testing (FPT) is another functional testing method that uses a series of probes to test the board’s components.
Environmental Stress Testing
Environmental stress testing is performed to ensure that the PCB can withstand harsh environmental conditions. This type of testing involves exposing the board to extreme temperatures, humidity, vibration, and shock. Thermal cycling is a common environmental stress testing method that involves exposing the board to alternating hot and cold temperatures. HALT (Highly Accelerated Life Test) is another environmental stress testing method that involves exposing the board to extreme temperatures and vibration to identify failure points.
In conclusion, quality control and testing are essential to ensure that the PCB functions as intended and meets industry standards. Inspection methods, functional testing, and environmental stress testing are all important components of the quality control and testing process.

