
PCB Assembly Process PPT: A Comprehensive Guide
If you are interested in learning about PCB assembly process ppt, you have come to the right place. A printed circuit board (PCB) is a crucial component of electronic devices. PCB assembly involves the process of attaching electronic components to the board. This process is complex and requires expertise to ensure that the final product is of high quality and functions as intended.

PCB assembly process ppt provides a step-by-step guide to the manufacturing process of printed circuit boards. The process involves various stages, including designing the board, drilling holes, applying a copper layer, and attaching electronic components. The ppt presentation provides detailed information about each stage of the process, including the tools and equipment required, and the challenges that may arise during the process. By following the guidelines provided in the presentation, you can ensure that your PCB assembly process is efficient and produces high-quality PCBs.
Overview of PCB Assembly

When it comes to PCB assembly, there are two main components: the PCB design principles and the components of PCB assembly. Understanding these two components is crucial to ensuring a successful assembly process.
PCB Design Principles
PCB design principles refer to the guidelines and best practices that are followed when creating a printed circuit board. These principles include considerations such as the size and shape of the board, the placement of components, and the routing of traces.
One important principle to keep in mind is that the board should be designed with manufacturability in mind. This means that the design should be optimized for the assembly process, with considerations such as component placement and orientation taken into account.
Another important principle is to ensure that the board is designed with proper signal integrity in mind. This means that the board should be designed to minimize noise and interference, with considerations such as trace routing and grounding taken into account.
Components of PCB Assembly
The components of PCB assembly refer to the various parts and materials that are used to create a printed circuit board. These components include the board itself, as well as the various electronic components that are soldered onto the board.
Some of the key components of PCB assembly include:
- PCB substrate material: This is the material that the board is made from, such as fiberglass or ceramic.
- Electronic components: These are the various components that are soldered onto the board, such as resistors, capacitors, and integrated circuits.
- Solder: This is the material that is used to join the electronic components to the board.
- Flux: This is a chemical that is used to clean the surfaces of the board and the components before soldering.
Overall, understanding the PCB design principles and the components of PCB assembly is crucial to ensuring a successful assembly process. By following best practices and using high-quality components, you can create a reliable and effective printed circuit board.
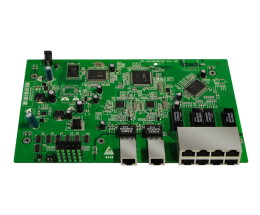
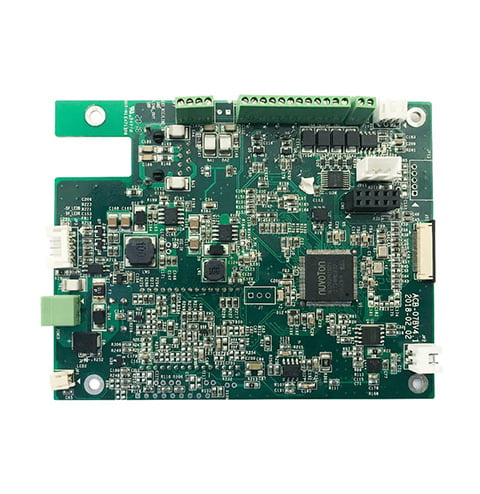
PCB Assembly Process

PCB assembly is a complex process that involves multiple stages. The process starts with the application of solder paste, followed by the pick and place of components onto the board, reflow soldering, and finally, inspection and quality control.
Solder Paste Application
The first step in the PCB assembly process is the application of solder paste to the board. Solder paste is a mixture of tiny solder particles and flux. The paste is applied to the board using a stencil, which ensures that the paste is applied only to the areas where components will be placed. The solder paste is then cured using a heat source.
Pick and Place
The next step is the pick and place of components onto the board. This is done using a pick and place machine, which picks up the components from a feeder and places them onto the board in the correct position. The machine uses a vision system to ensure that the components are placed accurately.
Reflow Soldering
The third step in the PCB assembly process is reflow soldering. This process involves heating the board to a specific temperature to melt the solder paste and create a permanent bond between the components and the board. There are two types of reflow soldering: convection and vapor phase. Convection reflow soldering uses hot air to heat the board, while vapor phase reflow soldering uses a vapor to heat the board.
Inspection and Quality Control
The final step in the PCB assembly process is inspection and quality control. This step involves checking the board for defects and ensuring that it meets the required specifications. Inspection can be done manually or using automated optical inspection (AOI) machines. AOI machines use cameras to inspect the board and identify defects such as missing components, incorrect component placement, and solder defects.
Overall, the PCB assembly process is a complex and multi-stage process that requires precision and attention to detail. By following the correct procedures and using the right equipment, you can ensure that your PCBs are assembled correctly and meet the required specifications.
Testing and Troubleshooting
Testing and troubleshooting are critical steps in the PCB assembly process. These steps ensure that the assembled PCB meets the required specifications and standards. In this section, we will discuss two types of testing commonly used in PCB assembly: functional testing and in-circuit testing.
Functional Testing
Functional testing is a type of testing that verifies the functionality of the PCB. This type of testing is carried out after the PCB has been assembled and all components have been soldered onto the board. The purpose of functional testing is to ensure that the PCB works as expected and meets the required specifications.
During functional testing, the PCB is subjected to a range of tests, including power-up tests, signal integrity tests, and environmental tests. Power-up tests check the power supply and ensure that the PCB is receiving the correct voltage. Signal integrity tests verify that the signals are being transmitted correctly between components. Environmental tests check the PCB’s performance under different environmental conditions, such as temperature and humidity.
In-Circuit Testing
In-circuit testing is a type of testing that verifies the functionality of individual components on the PCB. This type of testing is carried out during the assembly process, before all components have been soldered onto the board. The purpose of in-circuit testing is to identify any defects in the components before they are soldered onto the board.
During in-circuit testing, each component is tested individually to ensure that it is functioning correctly. This type of testing is carried out using a specialized testing tool, such as a bed-of-nails tester, which makes contact with the component’s test points. The tester then applies a voltage or current to the component and measures the response.
In conclusion, testing and troubleshooting are critical steps in the PCB assembly process. Functional testing and in-circuit testing are two types of testing commonly used in PCB assembly. Functional testing verifies the functionality of the PCB, while in-circuit testing verifies the functionality of individual components on the PCB. These tests ensure that the assembled PCB meets the required specifications and standards.
Advanced PCB Assembly Techniques
When it comes to PCB assembly, there are two primary techniques used in the industry: Surface-Mount Technology (SMT) and Through-Hole Technology (THT).
Surface-Mount Technology
SMT is the most commonly used technique for PCB assembly. It involves placing components directly onto the surface of the board. SMT components are smaller and lighter than THT components, making them ideal for high-density designs.
SMT components are mounted onto the board using solder paste, which is a mixture of flux and tiny balls of solder. The paste is applied to the pads on the board, and the components are placed onto the paste. The board is then heated, causing the paste to melt and the components to bond to the board.
Through-Hole Technology
THT is an older technique that involves drilling holes through the board and inserting components into the holes. The components are then soldered onto the board from the other side. THT components are larger and heavier than SMT components, making them ideal for applications that require high durability and reliability.
THT components are inserted into the holes on the board, and the leads are bent to hold the components in place. The board is then flipped over, and the leads are soldered onto the board.
Both SMT and THT have their advantages and disadvantages, and the choice between the two techniques depends on the specific needs of the project. SMT is generally faster and cheaper than THT, but THT is more reliable and durable.
In addition to SMT and THT, there are other advanced techniques used in PCB assembly, such as BGA (Ball Grid Array) and Micro-BGA. These techniques are used for high-density designs where SMT components are too large.
Overall, the PCB assembly process is a meticulous procedure that involves several critical steps. By understanding the different techniques available, you can choose the best method for your project and ensure that your PCB is assembled correctly and efficiently.
Challenges and Solutions in PCB Assembly
PCB assembly is a complex process that involves several stages, including component placement, soldering, and testing. Each stage has its own set of challenges that can affect the quality and reliability of the final product. In this section, we will discuss some of the common challenges faced during PCB assembly and their solutions.
Component Placement Accuracy
One of the most critical aspects of PCB assembly is the accuracy of component placement. Even a small deviation from the correct position can lead to a malfunctioning circuit or a complete failure of the device. Some of the challenges that can affect component placement accuracy are:
- Component warpage: Some components, such as BGA and QFN, are prone to warping due to the heat generated during soldering. This can cause misalignment and affect the accuracy of placement.
- Inconsistent component sizes: Components from different manufacturers may have slight variations in size, which can affect their placement accuracy.
- Human error: Manual component placement is prone to errors due to human factors such as fatigue, distraction, and lack of training.
To address these challenges, PCB assemblers use various techniques and tools such as:
- Automated component placement: Automated machines can accurately place components with high precision and speed, reducing the risk of human error.
- Vision systems: Vision systems use cameras to detect the position and orientation of components and adjust their placement accordingly.
- Component inspection: Inspecting components before placement can help identify any warpage or size variations and prevent placement errors.
Soldering Quality Issues
Soldering is another critical stage in PCB assembly that can affect the quality and reliability of the final product. Some of the challenges that can affect soldering quality are:
- Solder bridging: Solder bridging occurs when two adjacent solder joints are connected by excess solder, causing a short circuit.
- Solder voids: Solder voids are gaps or air pockets in the solder joint, which can weaken its mechanical and electrical properties.
- Insufficient solder: Insufficient solder can lead to poor electrical contact and weak mechanical bonding.
To address these challenges, PCB assemblers use various techniques and tools such as:
- Solder paste inspection: Inspecting the solder paste before application can help identify any defects such as voids and ensure consistent quality.
- Reflow profiling: Reflow profiling involves optimizing the temperature and time profile of the reflow oven to ensure proper solder melting and bonding.
- X-ray inspection: X-ray inspection can detect any defects such as voids and solder bridging that may not be visible to the naked eye.
In conclusion, PCB assembly is a complex process that requires careful attention to detail and quality control. By understanding the challenges and solutions involved in each stage of assembly, you can ensure the quality and reliability of your PCBs.

