
PCB Assembly Process Flow Chart PPT: A Comprehensive Guide to Understanding the PCB Assembly Process
If you’re in the electronics industry, then you’re probably familiar with the PCB assembly process flow chart ppt. It’s a crucial tool that helps manufacturers understand the different stages involved in assembling printed circuit boards. With a clear and concise presentation, the flow chart highlights the different steps involved in the process, including the placement of components, soldering, and testing.

The PCB assembly process flow chart ppt is an essential tool for anyone involved in the manufacturing of printed circuit boards. It provides a clear and concise overview of the different stages involved in the process, making it easier to understand the different steps involved. With a well-designed flow chart, manufacturers can identify potential bottlenecks in the process and make necessary adjustments to improve efficiency and reduce costs. Whether you’re a seasoned professional or new to the industry, the PCB assembly process flow chart ppt is an invaluable resource that can help you streamline your operations and produce high-quality printed circuit boards.
Overview of PCB Assembly

If you’re interested in learning about PCB assembly process flow chart ppt, it’s important to first understand the basics of PCB assembly. PCB assembly is the process of populating a printed circuit board (PCB) with electronic components. The goal of this process is to create a functional electronic device that can perform a specific task.
PCB Design Basics
Before the PCB assembly process can begin, the PCB design must be created. This involves designing a schematic that outlines the electrical connections and components that will be used in the device. The schematic is then translated into a physical layout that can be manufactured.
The physical layout is created using computer-aided design (CAD) software. This software allows designers to place components, route traces, and create a 3D model of the board. Once the layout is complete, it is exported to a format that can be used by the manufacturer.
Components of PCB Assembly
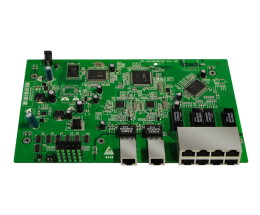
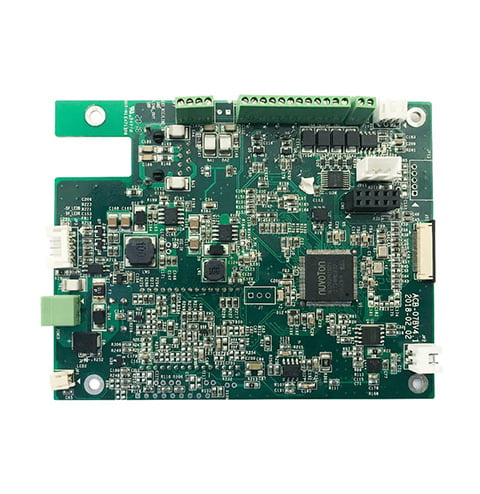
The PCB assembly process involves several components, including the PCB itself, electronic components, and solder. The PCB is the physical board that holds the electronic components. Electronic components can include resistors, capacitors, diodes, transistors, and integrated circuits. Solder is used to attach the electronic components to the PCB.
The PCB assembly process typically involves the following steps:
- Solder paste application: Solder paste is applied to the PCB using a stencil. This ensures that the paste is applied only to the areas where components will be placed.
- Component placement: Electronic components are placed on the PCB using automated equipment. The components are placed precisely according to the design.
- Reflow soldering: The PCB is heated in a reflow oven, which melts the solder and attaches the components to the board.
- Inspection: The finished PCB is inspected to ensure that all components are properly attached and that there are no defects.
Understanding the basics of PCB assembly is essential before diving into the PCB assembly process flow chart ppt. Knowing the components involved and the steps of the process can help you better understand the intricacies of PCB assembly.
Pre-Assembly Process

Before the actual assembly process begins, there are a few important steps that must be taken to prepare the printed circuit board (PCB) and the components. In this section, we will discuss two key steps in the pre-assembly process: Solder Paste Application and Pick and Place Machine Setup.
Solder Paste Application
The first step in the pre-assembly process is to apply solder paste to the PCB. This is done using a stencil, which is placed over the PCB and aligned with the solder pads. The solder paste is then applied to the stencil and pushed through the openings onto the PCB using a squeegee. The stencil is then removed, leaving a layer of solder paste on the PCB.
It is important to apply the correct amount of solder paste to ensure that the components are properly attached to the board. Too much solder paste can cause short circuits, while too little can result in weak connections. Therefore, it is crucial to follow the manufacturer’s guidelines for the amount of solder paste to use.
Pick and Place Machine Setup
The next step in the pre-assembly process is to set up the pick and place machine. This machine is used to place the components onto the PCB in their correct positions. Before beginning the assembly process, the pick and place machine must be calibrated to ensure that it is placing the components accurately.
During the setup process, the operator will input the correct component data into the pick and place machine. This includes the component type, size, and orientation. The machine will then use this data to pick up the components and place them onto the PCB.
It is important to ensure that the pick and place machine is set up correctly to avoid errors during the assembly process. Any mistakes made during this step can result in the components being placed in the wrong position or orientation, which can cause the board to malfunction.
The pre-assembly process is a critical step in the PCB assembly process. By properly applying solder paste and setting up the pick and place machine, you can ensure that the assembly process runs smoothly and that the final product functions correctly.
Soldering Techniques
When it comes to Printed Circuit Board (PCB) assembly, soldering is a critical process. There are several soldering techniques available, and the choice of technique depends on the specific requirements of the board. In this section, we will discuss the most common soldering techniques used in PCB assembly: reflow soldering, wave soldering, and selective soldering.
Reflow Soldering
Reflow soldering is the most common soldering technique used in PCB assembly. This technique involves applying solder paste onto the pads of the PCB, placing the components onto the paste, and then heating the board in a reflow oven. The solder paste melts and creates a strong bond between the component leads and the pads on the PCB.
Reflow soldering is a highly automated process, making it ideal for high-volume production. It is also a relatively fast process, with most boards taking only a few minutes to complete. Reflow soldering is suitable for surface-mount components, which are small and have a high pin count.
Wave Soldering
Wave soldering is a technique used to solder through-hole components on a PCB. This technique involves applying flux onto the board, passing the board over a wave of molten solder, and then cooling the board. The wave of molten solder wets the leads of the through-hole components and creates a strong bond between the components and the board.
Wave soldering is a fast and efficient process, making it ideal for high-volume production. However, this technique is not suitable for surface-mount components, which require reflow soldering. Also, wave soldering can create thermal stress on the board, which can cause damage to the components.
Selective Soldering
Selective soldering is a technique used to solder specific areas of a PCB. This technique involves applying flux onto the board, placing the board onto a soldering fixture, and then using a robotic arm to apply solder to specific areas of the board. Selective soldering is ideal for boards with a mix of through-hole and surface-mount components.
Selective soldering is a precise and accurate process, making it ideal for low-volume production. However, this technique is slower than reflow or wave soldering and is not suitable for high-volume production. Selective soldering is also more expensive than other soldering techniques, making it less common in PCB assembly.
In summary, there are several soldering techniques available for PCB assembly, each with its advantages and disadvantages. The choice of technique depends on the specific requirements of the board, including component type, board size, and production volume.
Inspection and Quality Control
Once the PCB assembly process is completed, the next step is to ensure that the finished product meets the required quality standards. This is done through a series of inspections and tests to verify that the PCB is free from defects and is functioning as intended.
Automated Optical Inspection
Automated Optical Inspection (AOI) is a process that uses cameras and software to inspect the surface of the PCB for defects such as missing components, incorrect component orientation, and solder joint defects. AOI is a fast and reliable method of inspecting PCBs and can detect defects that are not visible to the naked eye.
X-Ray Inspection
X-ray inspection is a non-destructive testing method that is used to inspect the internal structure of the PCB. This is particularly useful for inspecting complex PCBs where it is difficult to inspect the components and solder joints using other methods. X-ray inspection can detect defects such as insufficient solder, solder voids, and component misalignment.
Functional Testing
Functional testing is the final step in the PCB assembly process and is used to verify that the PCB is functioning as intended. This involves connecting the PCB to a test fixture and running a series of tests to verify that the PCB is performing the required functions. Functional testing is an important step in ensuring that the PCB meets the required quality standards and is functioning as intended.
In summary, inspection and quality control are critical steps in the PCB assembly process. By using methods such as AOI, X-ray inspection, and functional testing, you can ensure that your PCB meets the required quality standards and is functioning as intended.
Final Assembly and Packaging
Once all the components have been mounted and soldered onto the PCB, the board is ready for final assembly and packaging. This is the stage where the board is inspected for any defects or errors that may have occurred during the assembly process.
During the inspection process, the board is checked for any missing components, incorrect orientation, or any soldering defects. Any issues that are found are addressed and corrected before the board moves on to the final assembly and packaging stage.
Once the board has been inspected and all issues have been corrected, it is then assembled into its final form. This may include attaching any necessary connectors, cables, or other components to the board.
After the final assembly is complete, the board is then packaged for shipping or delivery. This may include placing the board in an anti-static bag, adding foam padding or other protective materials, and placing it in a box or other shipping container.
Overall, the final assembly and packaging stage is a critical part of the PCB assembly process. It ensures that the board is fully functional and ready for use, and that it is protected during shipping and delivery to its final destination.

