
PCB Assembly and Testing: A Comprehensive Guide
PCB assembly and testing are critical stages in the manufacturing process of electronic devices. PCB stands for Printed Circuit Board, and it is the foundation of most electronic devices. A PCB is a board made of non-conductive material, with conductive pathways etched onto its surface. These pathways connect different electronic components, allowing them to communicate with each other.

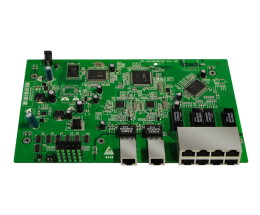
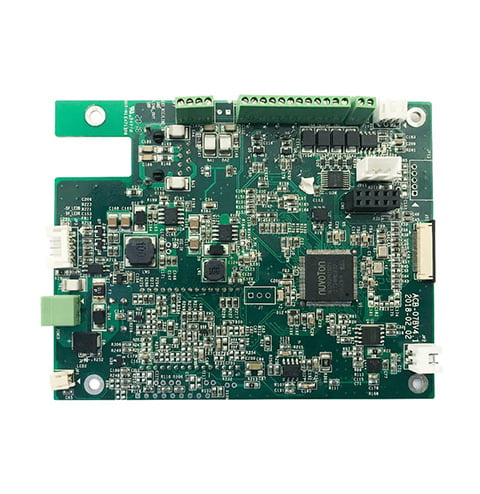
During the PCB assembly process, electronic components such as resistors, capacitors, and microchips are soldered onto the board. Once the components have been assembled, the board is tested to ensure that it is functioning correctly. PCB testing is essential because it ensures that the board is free from defects and that the electronic components are functioning correctly.
PCB testing is a complex process that involves several methods, including visual inspection, in-circuit testing, and functional testing. Each testing method has its advantages and disadvantages, and the choice of method depends on the type of board being tested and the specific requirements of the product. In the following sections, we will explore the different methods of PCB testing and their importance in ensuring the quality and reliability of electronic devices.
PCB Assembly Process

PCB assembly is the process of populating a circuit board with all the desired components. It involves several steps, including solder paste printing, pick and place, reflow soldering, and manual assembly.
Solder Paste Printing
Solder paste printing is the first step in the PCB assembly process. In this step, solder paste is applied to the pads on the circuit board using a stencil. The stencil ensures that the solder paste is applied accurately and consistently. After the solder paste is applied, the board is ready for the next step, pick and place.
Pick and Place
Pick and place is the process of placing the components on the circuit board. In this step, the machine picks up the components from the reels or trays and places them on the board. The machine uses a vision system to ensure that the components are placed accurately. This step is critical as any misplacement of the components can result in a non-functional board.
Reflow Soldering
Reflow soldering is the process of melting the solder paste to create a permanent connection between the components and the circuit board. In this step, the board is placed in a reflow oven, where it is heated to a specific temperature to melt the solder paste. The oven has several zones, each with a different temperature profile, to ensure that the solder is melted uniformly.
Manual Assembly
Manual assembly is the final step in the PCB assembly process. In this step, any components that could not be placed by the pick and place machine are assembled manually. This step is critical as it ensures that all the components are correctly placed and soldered. It is also the step where any rework is done to fix any issues that might have occurred during the previous steps.
Overall, the PCB assembly process is complex and requires attention to detail to ensure that the final product is functional. Each step is critical and must be performed accurately to ensure that the final product meets the desired specifications.
Testing Procedures

When it comes to PCB assembly, testing is a crucial step to ensure that the board functions as intended. There are several testing procedures that can be performed during and after assembly to ensure the quality and reliability of the final product. In this section, we will discuss three of the most common testing procedures: Automated Optical Inspection, In-Circuit Testing, and Functional Testing.
Automated Optical Inspection
Automated Optical Inspection (AOI) is a non-contact testing method that uses cameras to inspect the PCB for defects such as missing components, incorrect component placement, and solder defects. AOI is a fast and accurate testing method that can detect defects that may not be visible to the naked eye. AOI is typically performed after the SMT (Surface Mount Technology) assembly process and before the through-hole assembly process.
In-Circuit Testing
In-Circuit Testing (ICT) is a testing method that checks the functionality of the PCB by testing individual components and their connections. ICT is performed using a bed-of-nails fixture that makes contact with the PCB’s test points. The fixture sends signals through the PCB’s components and checks for proper functionality. ICT is a comprehensive testing method that can detect defects such as solder defects, component failures, and faulty circuitry.
Functional Testing
Functional Testing is a testing method that verifies the PCB’s behavior in its end-use environment. Functional Testing is typically performed after the PCB assembly is complete and the board is fully populated. The requirements of a functional test can vary greatly depending on the PCB and end product. Functional Testing can include testing the PCB’s inputs and outputs, testing the PCB’s response to various stimuli, and testing the PCB’s behavior under different environmental conditions.
Testing is a critical step in PCB assembly to ensure that the board functions as intended. Automated Optical Inspection, In-Circuit Testing, and Functional Testing are three of the most common testing procedures that can be performed to ensure the quality and reliability of the final product.
Quality Assurance
When it comes to PCB assembly and testing, quality assurance is a crucial step in ensuring that the final product meets the desired standards. Quality assurance involves a series of checks and tests that are carried out throughout the manufacturing process to ensure that the PCB meets the required specifications.
Standards Compliance
The first step in quality assurance is to ensure that the PCB complies with the relevant standards. There are several standards that PCB manufacturers must comply with, including IPC-6012, IPC-A-600, and IPC-610. These standards cover various aspects of PCB manufacturing, including design, fabrication, and assembly. Compliance with these standards ensures that the PCB meets the required specifications and is safe for use.
Inspection and Rework
Inspection and rework are also important steps in quality assurance. Inspection involves checking the PCB for defects, such as missing components, incorrect component placement, and solder defects. Inspection can be done manually or with the help of automated inspection equipment. Rework involves correcting any defects that are found during the inspection process. This can include removing and replacing components, correcting solder defects, and repairing damaged traces.
To ensure that inspection and rework are carried out effectively, it is important to have a well-trained and experienced team. The team should be familiar with the relevant standards and have the necessary skills and equipment to carry out the required checks and tests.
Quality assurance is a critical step in PCB assembly and testing. Compliance with standards, inspection, and rework are all essential components of quality assurance. By following these steps, you can ensure that your PCB meets the required specifications and is safe for use.
Design for Manufacturability
Design for manufacturability (DFM) is an essential aspect of PCB assembly and testing. DFM principles ensure that the PCB is designed to be easily and efficiently manufactured, assembled, and tested. By designing the PCB with DFM in mind, you can reduce manufacturing costs, improve product quality, and shorten the time to market.
PCB Design Guidelines
When designing a PCB for manufacturability, you should follow a few basic guidelines. First, you should use standard PCB sizes and shapes whenever possible. This will make it easier for manufacturers to source materials and components, and it will reduce the number of custom parts that need to be fabricated.
Second, you should design the PCB with the manufacturing process in mind. This means considering factors such as panelization, tooling holes, and fiducial marks. Panelization is the process of combining multiple PCBs on a single panel, which can reduce manufacturing costs and improve efficiency. Tooling holes and fiducial marks are used to ensure accurate alignment during the manufacturing process.
Third, you should design the PCB with testability in mind. This means including test points and test access points (TAPs) in the design. Test points are used to make electrical connections to the PCB for testing purposes, while TAPs are used to control and monitor the testing process.
Component Selection
When selecting components for your PCB, you should consider factors such as availability, cost, and quality. You should also consider the impact of component selection on the manufacturing process. For example, using components with a wide temperature range can reduce the need for specialized handling during the manufacturing process.
You should also consider the impact of component selection on the testing process. For example, using components with built-in self-test (BIST) capabilities can reduce the time and cost of testing. Additionally, using components with standardized interfaces and protocols can simplify the testing process and improve interoperability.
In summary, designing a PCB for manufacturability requires careful consideration of factors such as panelization, tooling holes, fiducial marks, testability, component selection, and more. By following DFM principles, you can reduce manufacturing costs, improve product quality, and shorten the time to market.
Packaging and Shipping
Once the PCB assembly process is completed, you need to package and ship the boards to their destination. Proper packaging and shipping are essential to ensure that the PCBs arrive safely and without any damage. Here are some packaging and shipping best practices to follow:
Moisture Barrier Packaging
Moisture is one of the biggest enemies of PCBs. Moisture can cause corrosion, short circuits, and other problems that can damage the boards. Therefore, it is essential to use moisture barrier packaging to protect the PCBs during shipping. Moisture barrier packaging is usually puncture-resistant, so it provides extra protection to the boards.
Vacuum Sealed Packaging
For moisture-sensitive circuits, vacuum-sealed packaging is the best option. Vacuum-sealed packaging removes all the air from the packaging, preventing moisture from entering the packaging. The vacuum-sealed packaging also protects the PCBs from dust and other contaminants, ensuring that they arrive at their destination in pristine condition.
Labeling
Proper labeling is critical to ensure that the PCBs are delivered to the correct location. Make sure that the packaging is labeled with the correct address, contact information, and any other relevant information. You can also include a packing slip inside the packaging that lists the contents of the package.
Shipping Methods
Choosing the right shipping method is also important. The shipping method you choose will depend on the size and weight of the package, the destination, and the urgency of the delivery. Some common shipping methods include ground shipping, air shipping, and expedited shipping.
By following these packaging and shipping best practices, you can ensure that your PCBs arrive at their destination safely and without any damage. Proper packaging and shipping are essential to protect your investment and ensure that your customers receive high-quality PCBs that meet their requirements.

