
Custom PCB Printing and Assembly: The Ultimate Guide
Custom PCB printing and assembly is a crucial part of the manufacturing process for electronic devices. Printed circuit boards (PCBs) are used to connect electronic components and provide a stable base for them to be mounted on. A custom PCB can be designed to meet specific requirements for a particular device or application, allowing for greater flexibility and functionality.

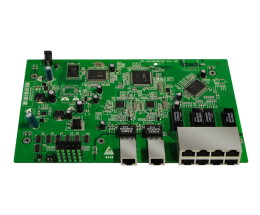
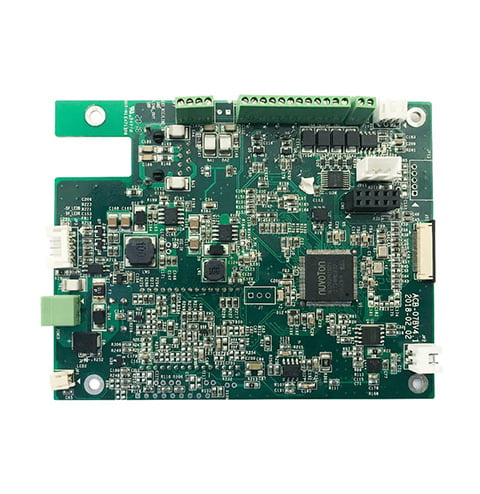
Custom PCB printing and assembly involves several steps, including design, fabrication, and assembly. The design process involves creating a schematic and layout for the PCB using specialized software. This design is then sent to a fabrication facility where the PCB is manufactured using various techniques such as etching, drilling, and plating. Once the PCB is fabricated, it is assembled with electronic components such as resistors, capacitors, and microchips to create a functional device.
Custom PCB printing and assembly is essential for many industries, including medical, automotive, and aerospace. The ability to create custom PCBs allows for greater flexibility in design and functionality, enabling manufacturers to create devices that meet specific requirements. Whether you are designing a new electronic device or upgrading an existing one, custom PCB printing and assembly can help you achieve your goals.
Basics of Custom PCB Printing

When it comes to custom PCB printing, there are a few basics to keep in mind. This section will provide an overview of some of the key considerations when designing and printing custom PCBs.
PCB Design and Layout
The first step in creating a custom PCB is designing the layout. This involves mapping out the circuitry of the board, deciding on the placement of components, and determining the size and shape of the board. There are a variety of software programs available for designing PCB layouts, including Eagle, Altium, and KiCad.
When designing the layout, it’s important to keep in mind the specific requirements of the project. This includes the size and shape of the board, the number and type of components, and the power and signal requirements of the circuit. Additionally, it’s important to consider factors such as manufacturability, which can impact the ease and cost of producing the final board.
Materials for PCB Fabrication
Once the design is finalized, the next step is to fabricate the board. This involves selecting the appropriate materials for the board, including the substrate, copper layers, and solder mask.
The substrate is the base material of the board, typically made of fiberglass or another insulating material. Copper layers are applied to the substrate to create the circuitry of the board. The solder mask is a layer applied over the copper to protect it from oxidation and to facilitate soldering of components.
There are a variety of materials available for each of these components, each with their own advantages and disadvantages. For example, FR-4 is a common substrate material due to its low cost and high durability, while polyimide is often used for flexible PCBs due to its flexibility and heat resistance.
Printing Techniques
Finally, there are a variety of printing techniques that can be used to create custom PCBs. The most common technique is known as “etch and plating,” which involves applying a layer of copper to the substrate and then etching away the unwanted copper using a chemical process. Another technique is known as “direct write,” which involves using a specialized printer to directly print the circuitry onto the substrate.
Each printing technique has its own advantages and disadvantages, and the choice of technique will depend on the specific requirements of the project. For example, etch and plating is a more cost-effective technique for large-scale production, while direct write is more suitable for rapid prototyping and small-scale production.
Overall, the process of custom PCB printing involves careful design and layout, selection of appropriate materials, and consideration of printing techniques. By keeping these basics in mind, you can create high-quality custom PCBs that meet the specific requirements of your project.
PCB Assembly Process

Custom Printed Circuit Board Assembly (PCBA) is a crucial step in the electronics manufacturing process. It involves assembling electronic components onto the printed circuit board (PCB) to create a functional electronic device. The process typically includes three main stages: soldering methods, component placement, and quality control.
Soldering Methods
Soldering is the process of joining two metal surfaces by heating them to a temperature that causes them to melt and flow together. The most common soldering methods used in PCBA are wave soldering and reflow soldering.
Wave soldering is a bulk soldering process that involves passing the PCB over a wave of molten solder. This process is ideal for through-hole components that are mounted on the PCB. Reflow soldering is a surface-mount technology (SMT) process that involves melting solder paste to join surface-mounted components to the PCB.
Component Placement
Component placement is the process of accurately positioning electronic components on the PCB. It is a critical step in the PCBA process that requires precision and accuracy. The placement of components is typically done using pick-and-place machines that use vacuum nozzles to pick up and place components onto the PCB.
Quality Control
Quality control is the process of ensuring that the finished PCBA meets the required standards. It is essential to ensure that the electronic device functions correctly and is safe to use. The quality control process typically involves visual inspection, automated optical inspection (AOI), and functional testing.
Visual inspection involves checking the PCBA for any defects or abnormalities. AOI is an automated process that uses cameras and software to inspect the PCBA for any defects or abnormalities. Functional testing involves testing the electronic device to ensure that it functions correctly.
The PCBA process is a critical step in the electronics manufacturing process. It involves soldering methods, component placement, and quality control to create a functional electronic device. The process requires precision and accuracy to ensure that the finished product meets the required standards.
Design Software for PCBs
Design software for printed circuit boards (PCBs) is a crucial tool for engineers and designers. It allows you to create schematics, simulate circuits, and design the layout of your PCB. There are a wide range of PCB design software available, from free and open source options to high-end commercial software.
Schematic Capture
Schematic capture is the process of creating a graphical representation of a circuit design. It is the first step in the PCB design process and is essential for creating a functional circuit. Some popular schematic capture software options include:
- KiCAD – an open source software suite that includes schematic capture, PCB layout, and 3D visualization.
- Eagle PCB Design – a popular commercial software that offers a user-friendly interface and extensive library of components.
- Altium Designer – a high-end commercial software that includes schematic capture, PCB layout, and advanced simulation tools.
PCB Layout Tools
After creating a schematic, the next step is to design the layout of the PCB. This involves placing components and routing connections between them. PCB layout tools are used to create the physical design of the board. Some popular PCB layout software options include:
- KiCAD – an open source software suite that includes schematic capture, PCB layout, and 3D visualization.
- Eagle PCB Design – a popular commercial software that offers a user-friendly interface and extensive library of components.
- Altium Designer – a high-end commercial software that includes schematic capture, PCB layout, and advanced simulation tools.
When selecting a PCB design software, it is important to consider your specific needs and budget. Some software options are better suited for small projects or hobbyists, while others are designed for large-scale commercial projects. Additionally, some software may have a steeper learning curve than others, so it is important to choose a software that matches your skill level.
Turnaround Time and Prototyping
When it comes to custom PCB printing and assembly, turnaround time is a crucial factor to consider. The faster the turnaround time, the quicker you can bring your product to market. In this section, we will discuss the two main types of PCB production, rapid prototyping, and batch production, and how they affect turnaround time.
Rapid Prototyping
Rapid prototyping is a process that involves creating a small number of PCBs to test the design before moving on to mass production. This process is essential for ensuring that the PCB design meets the required specifications and works as intended. The turnaround time for rapid prototyping is typically faster than batch production, with some companies offering same-day or next-day turnaround.
To speed up the prototyping process, many PCB manufacturers offer online design tools that allow you to upload your design files and receive an instant quote. These tools also help you to optimize your design for manufacturability, reducing the risk of errors and ensuring that your PCB is ready for mass production.
Batch Production
Batch production is the process of creating a large number of PCBs at once. This process is more cost-effective than rapid prototyping, but the turnaround time is typically longer. The exact turnaround time will depend on the PCB manufacturer, the complexity of the design, and the number of PCBs required.
To minimize the turnaround time for batch production, it’s essential to work with a PCB manufacturer that has a streamlined production process. Look for a manufacturer that uses advanced equipment and software to optimize the production process, reducing the risk of errors and ensuring that your PCBs are produced quickly and accurately.
In summary, the turnaround time for custom PCB printing and assembly depends on the type of production you require. Rapid prototyping is faster but more expensive, while batch production is more cost-effective but slower. By working with a reputable PCB manufacturer that offers both types of production, you can ensure that your PCBs are produced quickly, accurately, and cost-effectively.
Cost Considerations and Budgeting
When it comes to custom PCB printing and assembly, cost considerations and budgeting are critical to ensure that your project is feasible and profitable. Here are some factors to keep in mind when estimating costs and creating a budget.
Cost Estimation
To estimate the cost of your custom PCB printing and assembly project, you need to consider several factors, including board complexity, component types, assembly technologies, order quantities, and turnaround times. For example, the more complex your board design is, the more time and effort it will take to manufacture, which will increase the cost. Similarly, if you require specialized components or assembly technologies, the cost will also be higher.
One way to estimate the cost of your project is to use a PCB cost calculator, which takes into account the number of layers, board dimensions, and other variables to provide an estimate of the total cost. However, keep in mind that these calculators are only estimates, and the actual cost may vary depending on the specific requirements of your project.
Bulk Ordering
If you plan to order a large quantity of custom PCBs, bulk ordering can help you save money on the overall cost. Most PCB manufacturers offer volume discounts for large orders, which can significantly reduce the cost per unit. For example, if you order 100 PCBs, the cost per unit may be $10, but if you order 1000 PCBs, the cost per unit may drop to $5.
However, keep in mind that bulk ordering may not always be the best option, especially if you are working on a small project or have limited storage space. You may end up with excess inventory that you cannot use or sell, which can be a waste of money and resources. Therefore, it is essential to strike a balance between cost savings and practicality when deciding on the order quantity.
By taking these cost considerations into account and creating a realistic budget, you can ensure that your custom PCB printing and assembly project is successful and profitable.

